Bulawayo and the Matabele Rebellion (or Umvukela) – Part 2, after the first few weeks, a change in tactics
Introduction
Marshall Hole, the B.S.A. Company employee for over twenty-five years wrote, “Faced with a grain famine, robbed of their newly-acquired cattle, importuned in season and out of season to provide unaccustomed labour, bullied by their former tribesmen and slaves (Maholi) who had enlisted in the native police force…what wonder if the Matabele indunas began to seek a short cut out of their troubles.”[1]
The short-cut was a rebellion that was neither very carefully co-ordinated or thought out, merely an agreement to rise and murder every white in the country. It arose from and was linked to the prophecies of the Mlimo and the central motivation was to cause widespread killing – there was little more planned than this. Mason states that as a military operation it was hardly planned at all, and that the amaNdebele never grasped the significance of cutting the telegraph line through which the whites did all their communications and planning. He believes their military policy should have been to cut the roads, particularly those to the south, to avoid battles as they could not overcome forces with a Maxim gun, to cut off stragglers and to starve the whites out of the towns.
They did ambush some wagons, but apart from attacking Brand’s patrol on the 10 April made no really determined attempts to keep the roads closed; the Mangwe road through which supplies and the MRF reinforcements came was apparently left deliberately open to give the whites the opportunity of escaping south!
Gann writes they were though more formidable opponents than in the days of Lobengula. “They had learned the tactical lessons of the Bembesi and Shangani battles and avoided mass assaults in open country against automatic weapons and well-directed rifle fire. Instead they operated in smaller and more mobile bodies, fighting in skirmishing order, relying on guns more than assegais. The white men thus faced an enemy vastly superior in numbers, who chose to fight in broken country and dense bush, where machine guards could not do so much execution.”[2]
After the first few weeks
Morale in Bulawayo fell to its lowest ebb; once again the rebels had been left in possession of the northern bank of the Umguza river. Soon after Macfarlane’s skirmish on the Umguza river the council of defence decided more effort must be made to break up the impis whose boldness was growing daily.
Col Napier held a parade, a gloomy reporter noting, “The turnout was as smart as could be expected from a regiment, no two men of which have been issued with the same kit, or in some cases no kit at all!”
Selous writes, “The situation was getting unbearable, the town being surrounded by the Matabele and the operations against them with a view to clearing the country round Bulawayo not having hitherto been at all successful. In fact, an uncomfortable feeling was prevalent that we were being closed in upon every side.”
It was clear that the amaNdebele were concentrated at two positions. In the north-east in a crescent beginning at the Khami river on Percy Crewe’s farm Redbank commanded by Nyamande, one of Lobengula’s sons; the centre under the indunas Mtini and Siginyamatshe along the northern banks of the Umguza river and the left wing that stretched to Ntabazinduna Hill. Although dry most of the year the Umguza has steep banks and makes a natural obstacle for wagons and horsemen and its thick bush offered good cover…the Mwari oracle had assured the amaNdebele it would not be crossed by whites, “If we attacked them all our horses would fall down dead and the Englishmen’s bullets would turn to water.”[3]
In the south another amaNdebele force based in the Matobo Hills was twenty miles to the south of Bulawayo across the Tuli road that had fought with Brand’s patrol on the 10 April.
23 April - Captain Mainwaring goes to Figtree to repair the telegraph line
Sixty mounted men and two telegraphists left and after repairing the telegraph line returned on 26 April.
25 April - Captain Macfarlane’s patrol to Colenbrander’s Farm on the Umguza river
Another attempt was to be made to dislodge the amaNdebele from the vicinity of Bulawayo. One hundred and sixteen troopers from units including the Grey’s Scouts, B Troop of the BFF and the Afrikaner Corps, one hundred Cape Volunteers and seventy-five friendly natives with the Hotchkiss and a Maxim gun made up the column. The plan was for the Grey’s Scouts to be pursued and for the rebels to attack the main body so that the quick-firing weapons could be brought to bear and inflict serious casualties.
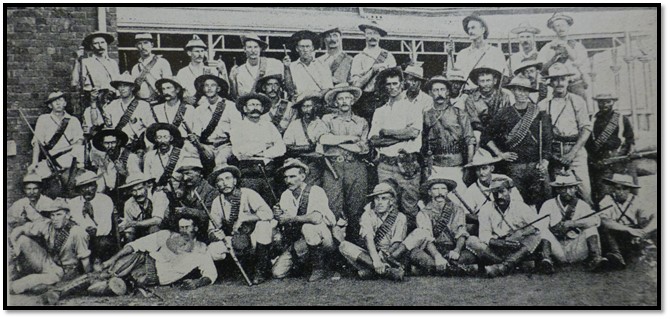
Sunshine and Storm: Grey’s Scouts – the four standing with folded arms (L-R) Lieut Jack Stuart, Lieut Fred Crewe, Capt George Grey, Lieut Hodgson
Colenbrander’s farm was reached without any clash, the Hotchkiss and Maxim gun were set up beside the farm buildings, the Grey’s Scouts went down to the river to draw the rebels in. Siginyamatshe’s war horn was heard again, but the amaNdebele proved initially wary and generally kept to the thick bush. Then with a loud shout they rushed on the Grey’s Scouts who fell back to within two hundred yards (180 metres) of the farmhouse when the Maxim began firing. A steady fire broke out for nearly an hour before Macfarlane ordered the Afrikaner Corps across the Little Umguza.
The amaNdebele spirit broke when the troopers crossed unscathed to the other bank despite the Mlimo saying they would be blinded. Then Macfarlane’s other troops advanced against the amaNdebele forces. A fresh impi advancing from the west was halted by the Maxim with the 37mm Hotchkiss landing its one-pounder shells amongst groups of rebels that caused many casualties.
The Cape Volunteers were given the task of clearing the stragglers out and soon had them fleeing and pursued for about two miles. Captain Macfarlane decided further pursuit was risky and the column headed back to Bulawayo. Casualties included five Troopers killed and six wounded, including three friendly natives. The estimate for the number of rebels killed was one hundred and fifty. However it was noticeable that the amaNdebele now moved away from the vicinity of Bulawayo.
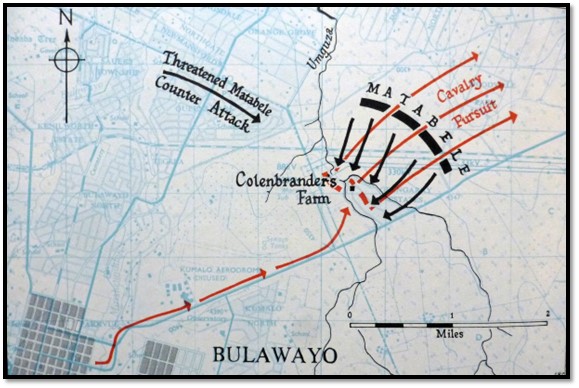
Bulawayo, Historic Battleground: Macfarlane’s second action on the Umguza river, 25 April 1896
A new phase begins
With all the settlers in the outlying districts that had managed to escape the killings now rescued, the council of defence decided their forces should now go on the offensive. With this in mind, two much larger forces were organised and equipped to take to the field. However a short lull in the fighting ensued as both sides consolidated their positions. A shocking scene occurred when three alleged spies were caught and hanged from a tree still standing in JMN Nkomo Street (previously Main Street)[4]
Fortunately the telegraph line was largely left uncut and this facilitated the co-ordination of patrols and enabled forces in the districts to telegraph Bulawayo for assistance or further orders.
Cecil Rhodes resigned from the Board of the B.S.A. Company with the Jameson Raid enquiry in progress and on 2 May Earl Grey arrived as Administrator and to replace Duncan. However his appointment was not popular and he wrote, “shortly after my arrival here they held a public meeting in the Square and passes a resolution unanimously to the effect that the gaol should be cleared of all its occupants and the Administrator and other members of the Government take their place.”[5]
Sir Richard Martin, representing the Imperial Government, arrived soon after Earl Grey on 21 May as deputy commissioner and with General Sir Frederick Carrington would command the military forces.
Colonel Napier’s force meets the relief force coming from Salisbury
At the beginning of May 1896 a large force left Bulawayo with Troops from most of the units involved and including two hundred and fifty friendly natives with Selous, a seven-pounder RML, a 2.5 inch RML gun, a 0.45 cal Nordenfeldt,[6] a 0.45 cal Maxim and a one-pounder 37m QF Hotchkiss.[7]
No rebels were seen as the column approached Ntabazinduna in skirmishing order, but several kraals had been recently used and abandoned and were burnt. In the afternoon eighty Grey’s Scouts came suddenly upon about three hundred amaNdebele in thick bush that ran from Ntabazinduna to the Gwelo road. Selous’ with the friendly natives was ordered to drive the rebels away and watched as they slowly withdrew. He was of the opinion that if the mounted men had been ordered up to Ntabazinduna they could cut the rebels off and inflicted severe casualties in the open country.
Napier failed to give the order, the rebels withdrew, and that night when the column laagered at Graham’s store on the Khoce river much criticism was directed at Napier.
Reinforcements for Bulawayo
On the 19 May Napier’s force met up with the Salisbury Relief Column (SRF) of one hundred and fifty mounted men under the command of Robert Beal and accompanied by Charles Metcalf[8] and Cecil Rhodes near the Pongo river. The SRF’s start from Salisbury had been delayed by lack of transport as so many trek oxen had died from the recent rinderpest outbreak. They had a skirmish before Gwelo but were otherwise unopposed. Ransford writes they moved with ‘leaden feet’ as they left the Hunyani (Manyame) river on 18 April and it took four weeks before they left Gwelo.[9]
The B.S.A. Company had requested the Imperial Government to recruit five hundred men at the company’s expense, but in the end eight hundred and fifty were recruited as the Matabeleland Relief Force (MRF)[10] under Lieut-Col Herbert C.O. Plumer[11] and they began moving from Mafeking, then the railway terminus, from 6 April. The MRF was made up of one hundred miners and engineers (fifty from De Beers) one hundred and twenty farmers, one hundred clerks and fifty old soldiers, thirty from the colonial corps. The remaining four hundred had either served in the Bechuanaland Border Police (BBP) or the B.S.A. Company Police with many former ‘Jameson Raiders.’[12] Around two hundred Cape Volunteers led by Major Robertson and Captain Weston-Jarvis gave a good account of themselves throughout.
Fighting on the Insiza river
After a planning meeting, a column of four hundred men under Col Spreckley was sent south into the Insiza district to look for any impi’s while the main body marched along the Insiza river; the two forces planned to meet at the ford across the Insiza river on the Bulawayo-Belingwe road.
Spreckley’s column encountered no opposition, but Napier’s column saw action on 22 May. Early in the morning the Grey’s Scouts and Afrikaner Corps were scouting ahead when a large group of amaNdebele that had been hiding concealed in a dry riverbed and a running fight began that ranged over four miles (6½ kms) The rebels tried hard to cut the scouts off from the main body but failed to do so.
The next day further skirmishing took place, but the rebels were soon dispersed and some kraals burnt down. The column came across the remains of a group of men, women and children who had been murdered six weeks before and were respectfully buried. Cattle and grain stores were burnt and on 27 May the two forces joined up at the previously agreed location and three days later were back at Bulawayo.
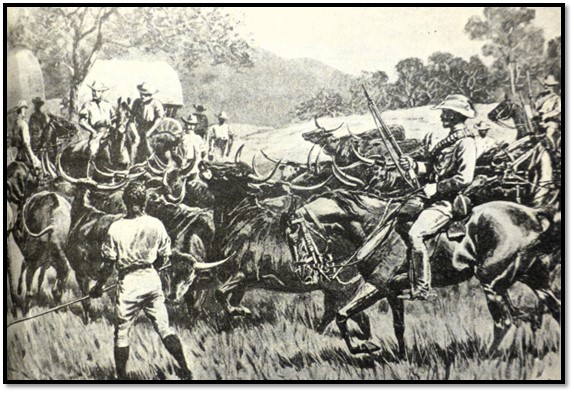
Napier’s and Spreckley’s forces rejoin at the Insiza river, 27 May 1896
Imperial Forces arrive at Bulawayo
Sir Hercules Robinson, who succeeded Sir Henry Loch on 30 May 1895 as High Commissioner for Southern Africa, decided that the settlers were unable to put down the rebellion unaided and tasked General Goodenough, then in command of the forces at the Cape, to raise a force of Irregular Horse for service in Matabeleland.[13]
The authorised number of this force was to be eight hundred and fifty men, in fourteen Troops, forming five squadrons, each with Maxim machine guns plus two hundred and fifty native troops under Captain Coope.
The first to arrive were a small Corps of ‘Cape Boys’ under Major Robertson and Captain Jesser Coope who in a month of hard marching travelled 600 miles (965 kms) and did some impressive soldiering followed by the first of Colonel Herbert Plumer’s forces, the York and Lancaster Regiment numbering three hundred and seventy, who arrived at Bulawayo on 24 May 1896 with two Maxims.[i]
24 May - The Imperial Forces first engagement with the amaNdebele
On the night of 24 May, soon after arriving, this force split into two columns, one led by Colonel Plumer,[14] the other by Major Watts, and moved out shortly before midnight to the north-west of the town between the Khami and Umguza rivers. About eight miles from Bulawayo, much closer than intelligence reports indicated, the Watts advance-guard stumbled upon a force of rebels in the dark who immediately opened fire. The mounted Troops quickly dismounted and fired volleys into the surrounding bush that discouraged their attackers from making any kind of frontal attack. Plumer’s column, hearing the firing, came to their aid forming a square with the combined forces and using the Maxim’s to sweep the bush. The amaNdebele quickly disengaged leaving the columns to rest within the square until daylight.
At first light scouting parties went out to search for the rebels and a patrol under Captain Knapp came upon their outposts in the wooded ridges of the adjacent hills and spasmodic firing broke out. By 8am the whole body of Imperial Forces moved forward to engage the amaNdebele. The outposts were driven in and an attack launched against the main body of rebels who were driven back across three rocky ridges and then chased for up to three miles in more open country.
On their regrouping the column rested during the midday and then set off for Chelmer farm on the Khami river where the rebels were reported to have gathered at a strong position. After marching for two hours, scouts reported rebels on the left flank. The advance-guard at once engaged a strong force who were positioned on a thickly wooded hill crossing two gullies under a hail of bullets. Once the advance-guard were on the hill the rebels left their position and were chased until darkness began to close in. By now the horses were showing signs of fatigue and a return was made to Bulawayo, about sixteen miles (26 kms) away.
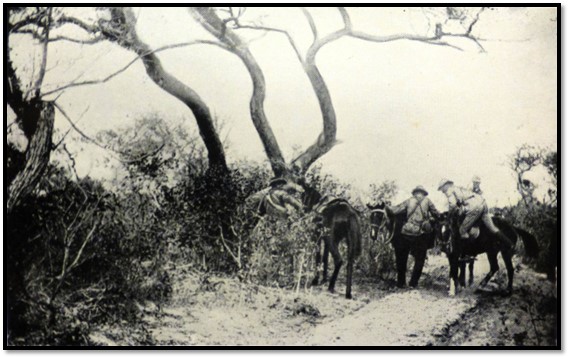
Men who made Rhodesia; Reconnaissance patrol, 1896
Major-General Carrington takes command
The Imperial Government decided that with the rebellion still spreading, the settlers and the B.S.A. Company lacked the resources and manpower to bring the revolt to an end, and to use Imperial troops for that purpose. Major-General Carrington, who had seen considerable service in South African frontier wars, was appointed in command, aided by Colonel Plumer and Lieut-Colonel Baden-Powell with Captain Vyvyan as Brigade-Major and arrived on 3 June.
Carrington “was now a swollen caricature of the dashing young cavalry officer who once won renown in innumerable colonial wars”[15] and left most of the actual soldiering to his young subordinates.
Plumer attempts to engage the rebels in the Gwaai Valley
Two fighting columns went out; Macfarlane’s to the Umguza, but the bolder one was Plumer’s into the Gwaai Valley. It was a great learning curve for the Colonel more accustomed to military tactics in Europe than Africa. One of his troopers wrote, “from reveille before daybreak until lights out at 8:45pm the bugles are sounding and star shells lit up the sky for miles around…at night when laager was formed, what with trumpets, the pyrotechnic display of rockets and burning of grass around, the position of the Force was very completely advertised to the neighbourhood at large.”[16] Ransford writes the amaNdebele simply kept out of the way and Plumer’s men after a great deal of ineffective marching and countermarching were on the edge of mutiny when fatigue brought them back to Bulawayo.
The amaNdebele make a bold move within six miles of Bulawayo
No sooner had the two columns set off, then reports came in that a large force of amaNdebele had come up the Umguza river and were at the ruins of the Welsh Harp Hotel just six miles (9 kms) from Bulawayo. Mkwati had managed to convince the amaNdebele and Kalanga forces that any white troops that crossed the Umguza would be blinded – Ransford writes that it was a gambler’s attempt to win the war at this late stage.
6 June - Col Spreckley takes a Bulawayo force to the Umguza
At 6am with few Imperial troops in Bulawayo, Jack Spreckley marched two hundred volunteers with Selous, van Niekerk and Grey, plus Baden-Powell and fifty Salisbury volunteers out of Bulawayo for this attack. Just short of the Welsh Harp Hotel the mounted troops moved into extended line half a mile long and galloped for the reported amaNdebele position. A half-hearted volley came at them before the rebels turned and fled. Clearly the fact that the Mlimo’s prediction had not come true resulted in their complete disillusionment. The pursuit went on for five miles (8 kms) and more than two hundred were counted killed.
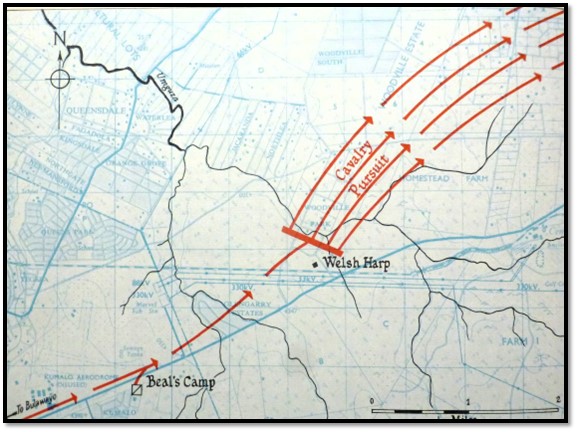
Bulawayo, Historic Battleground: Spreckley’s action on the Umguza river, 6 June 1896
Rebel forces leave the Umguza and split up
With Mkwati’s reputation now damaged, the amaNdebele forces withdrew south to the Matobo Hills, the Kalanga moved north to Manyanga (Ntaba-zika-Mambo) where Mkwati’s shrine was located and there now followed a pause in the fighting and clearly the amaNdebele presence in Bulawayo’s neighbourhood was now lifted.
The Matabele Rebellion (Umvukela) enters a new phase
Additional forts were established at Shiloh and Inyati by Col Spreckley and just as the citizens of Bulawayo began to believe the mood was lifting, then on 15 June the news came through that one hundred and thirty whites had been murdered in one week in Mashonaland and followed the same pattern as in Matabeleland; “within a day or two they had hacked to death practically every isolated family and individual within a radius of eighty miles of Salisbury.”[17]
With approximately two thousand white and six hundred native troops much more forceful action could be taken against the rebels. Mounted patrols kept any rebels outside their refuges in the Matobo and Manyanga Hills on constant move, the forts interfered with their supplies and supplied local information of their movements, and by rounding up cattle, goats and sheep and seizing grain supplies and burning kraals pressure was put on rebel food supplies.
The MRF scored a major success in driving the rebels out of the Mayanga Hills (Ntaba zika Mambo) – the article on the website www.zimfieldguide.com is referenced below – with a triple movement after a swift night march from Inyati. Rebel positions, although strongly resisted, were stormed, the Cape Volunteers under Major Robertson carrying out some hard fighting.
Carrington then turned his attention to the Matobo Hills, but their vastness and the ruggedness of the terrain that favoured defensive tactics proved a difficult task. The Matobo were too extensive to blockade and extremely difficult to storm, a jumble of granite boulders built up into kopjes, with innumerable caves dotted throughout that provided good cover for the amaNdebele defenders. They could fire from the caves upon the advancing MRF irregulars and then slip away when defeat threatened. The only effective way to make them surrender was to burn their crops and prevent any planting but starving them out of their strongholds was time-consuming and threw an increased financial burden on the B.S.A. Company that was financing the military operations.
Rhodes negotiates peace with the Chief’s
Rhodes had consulted with the London Board of Directors on the effects of the Jameson Raid and seen Chamberlain at the Colonial Office. In March he was in Salisbury before travelling with Beal’s column to Bulawayo and decided to negotiate with the amaNdebele Chief’s in the Matobo. One of the amaNdebele biggest complaints was that there was no single central person with whom they could negotiate and who would listen to them. They said the Native Commissioners were always being transferred between districts and in many cases, did not have the power to take action, merely passing on their complaints. An article on the Indaba site is listed below.
Peace is restored
The amaNdebele chief’s agreed to a series of negotiations and stopped the fighting. Rhodes agreed that each should have their own district, that their would be a clear line of communication when they presented their grievances from the Native Commissioners to the Administrator. They would receive salaries and their people could return to their kraals and plant crops with the coming rainy season. The process of disarming the amaNdebele began in October 1896 and more than 2,500 firearms and 13,000 assegai’s were surrendered.
With crops unplanted or destroyed, the B.S.A. Company distributed over five million lbs (2,260,000 kgs) of maize to tide the people over until the next season’s crops had ripened.[18]
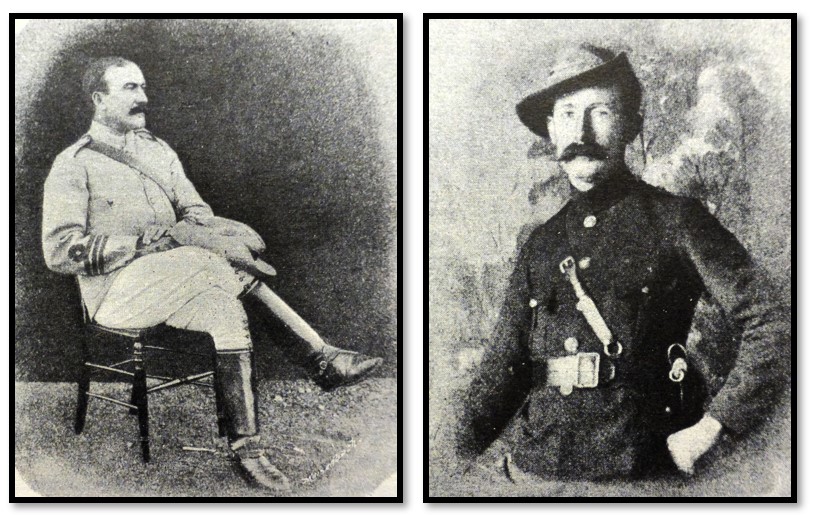
Col J.A. Spreckley Capt van Niekerk
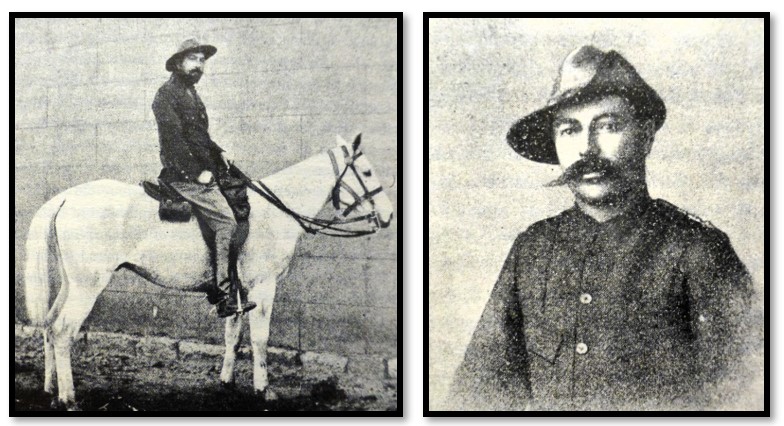
Capt R. Macfarlane Col W. Napier
Other articles describing Matabeleland Rebellion (Umvukela) events in 1896 on the website www.zimfieldguide.com include:
Under Matabeleland North
- Battle of Ntaba zika Mambo, Manyanga or Mambo Hills
- Mambo Rebellion Memorial – with three oral history accounts collected by Foster Windram in 1936 and 1938 concerning the killings at West’s store
Under Matabeleland South
- Filabusi Memorial and the Edkins Store killings
- Fort Rixon Rebellion Memorial (Matabele Uprising, or First Umvukela, 1896)
- Pongo Memorial (Matabele uprising, or First Umvukela, 1896)
- David Tyrie Laing and the near-disaster Matobo Hills engagement in the 1896 Matabele Uprising or Umvukela
- Battle of Tshingengoma or Sikombo’s stronghold
- Fort Umlugulu (previously Fort Nsezi, or Sugar-bush Camp) and the Cemetery
- The Matabele uprising or First Umvukela Indaba Site (Rhodes Indaba site)
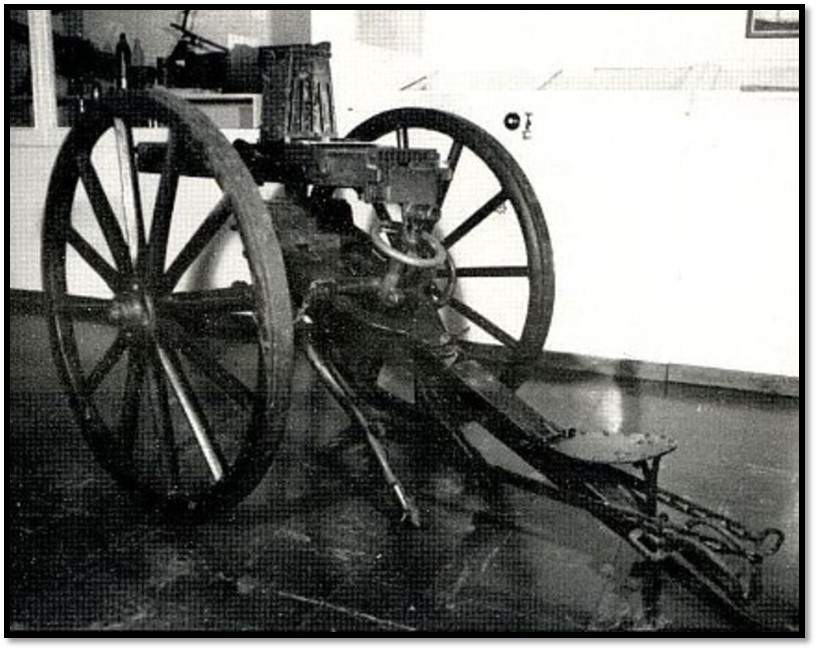
Photo Ian Cross: 0.45 cal 5 barrel Nordenfelt gun and its carriage at Grahamstown Museum. The same model
as those taken from the Portuguese in 1891 and used in the Matabele Rebellion
References
I.J. Cross. The Ordinance and Machine Guns of the British South Africa Company 1889-1896, Part 1. http://samilitaryhistory.org/vol162ic.html
I.J. Cross. The Ordinance and Machine Guns of the British South Africa Company 1889-1896, Part 2. http://samilitaryhistory.org/vol163
L.H. Gann. A History of Southern Rhodesia; Early Days to 1934. Chatto and Windus, 1965
N. Gomm. Further Notes on Early Rhodesian Military Units. Military History Journal Vol 1 No 4 - June 1969. http://samilitaryhistory.org/vol014ng
H. Hensman. A History of Rhodesia compiled from Official Sources. William Blackwood and Sons, London 1900
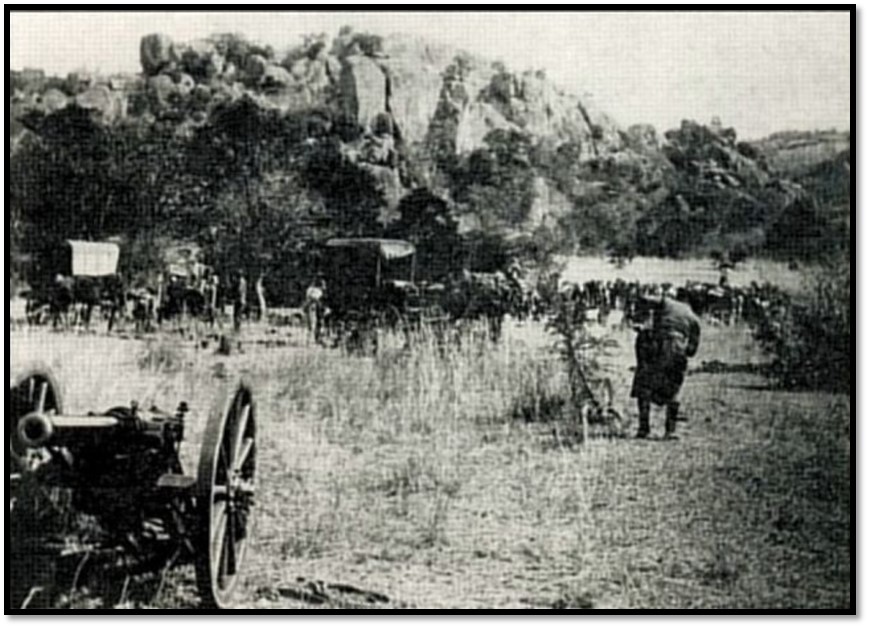
Photo Ian Cross: 2.5-inch RML Jointed Mountain Gun taken from the Portuguese in 1891.
The photograph was taken in the Matopos after an engagement on 20 July 1896 during the Matabele Rebellion.
Notes
[1] The Birth of a Dilemma, P195-6
[2] A History of Southern Rhodesia, P130
[3] Bulawayo: Historic Battleground of Rhodesia, P97
[4] See the article The Hanging Tree under Bulawayo on the website www.zimfieldguide.com
[5] Bulawayo: Historic Battleground of Rhodesia, P102
[6] Ian Cross writes the Nordenfelt’s were 0.45 cal five barrel, gravity-fed machine guns that were operated manually with a lever.
[7] A History of Rhodesia, P90
[8] Sir Charles Metcalfe with Sir Douglas Fox and Partners acted jointly as consulting engineers for the construction of the various lines making the Rhodesia railway system for the B.S.A. Company. Metcalfe personally located all the lines and was in charge of the construction work, although not the Victoria Falls bridge. Later he was joint consulting engineer with Sir Douglas Fox and Partners for the Benguela Railway through Portuguese West Africa, which was begun in 1903 and reached the Congo frontier in August 1928.
[9] Bulawayo: Historic Battleground of Rhodesia, P96
[10] Men who made Rhodesia, P66; The MRF included many of the Rhodesia Mounted Police who had been taken prisoner at Doornkop after the Jameson Raid
[11] Plumer, then a Major, had been assistant military secretary at the Cape
[12] A History of Southern Rhodesia, P132
[13] A History of Rhodesia, P94
[14] See the article Field Marshall Herbert Charles Onslow Plumer, 1st Viscount Plumer, GCB, GCMG, GCVO, GBE and his connection with Matabeleland under Bulawayo on the website www.zimfieldguide.com
[15] Bulawayo: Historic Battleground of Rhodesia, P106
[16] Ibid
[17] Birth of a Dilemma, P200
[18] A History of Southern Rhodesia, P133